
3 - Children
Click to view full screen…
Adding children to the system is one of the first steps in setting up Rumble's Quest.
Accurate records are important, so most schools and organisations import children from their existing enrolment data, though you can also add them individually.
The Children page is where you view and manage all children in your school or organisation.
Page Overview
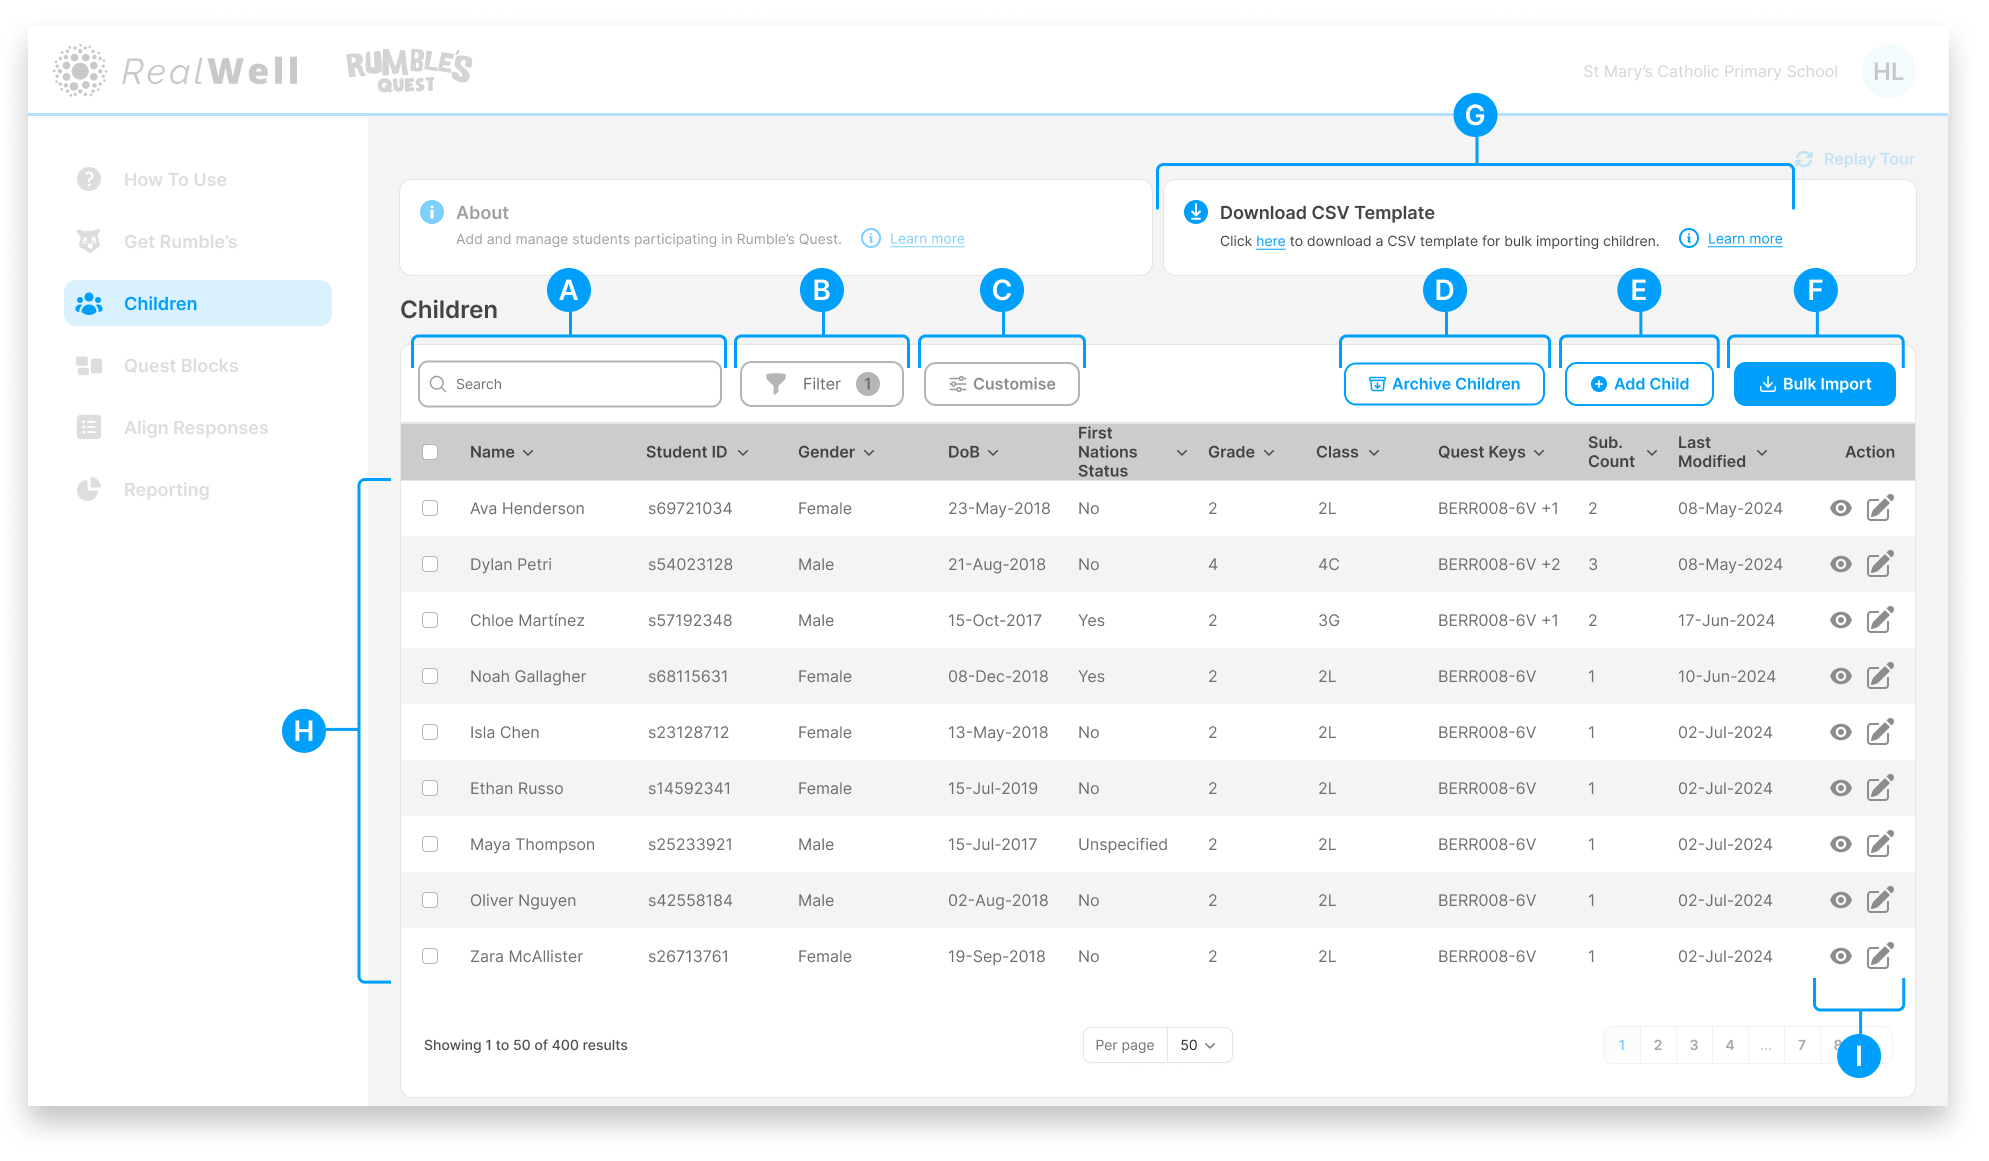
(A) Search – Find children by name, Child ID, and other columns
(B) Filter – A powerful tool for managing your children list, especially as it grows over time. Filter by grade, class, Quest Block Mode, and more. See Filter Children.
(C) Customise – Choose which columns are displayed in the table. See Customise Columns
(D) Archive Children – Select one or more children and archive them to remove them from the active list. See Archive Children.
(E) Add Child – Add a single child manually See Add Child.
(F) Bulk Import – Import multiple children from a CSV file. See Bulk Import Children.
(G) Download CSV Template – Download the template file for preparing bulk imports
(H) Children table – Displays all children in your school or organisation
(I) Actions – View a child's submission history or edit their profile
Default Sort Order
The Children table is sorted by Last Modified date, so children who were most recently added or updated appear first. For most schools and organisations, this means your current cohort is readily visible without needing to filter.
Adding Children
Before children can play Rumble's Quest, their details need to be added to the system. You can do this in two ways:
Bulk Import (Recommended)
Repeat this process each year to keep your data current as children progress through grades.
For schools and organisations, bulk import is the most efficient method for both initial setup and annual updates. Export your enrolment data, format it using the CSV template (G), and import via (F) Bulk Import.
The system matches children by Child ID, so re-importing updates existing records rather than creating duplicates.
See Bulk Import Children for the full process.
Add Individually
For one-off additions, click (E) Add Child to add children one at a time. See Add Child.
Archiving Children
Over time, children leave your school or organisation, but their data still has value. Archiving removes children from the active list without deleting their records or submission history.
Use the checkboxes in the (H) Children table to select one or more children, then click (D) Archive Children. Archived children can be restored at any time.
See Archive Children for the full process.
Actions
Each row has two action icons:
View (eye icon) – View the child's submission history. See View Submission History.
Edit (pencil icon) – Edit the child's details. See Edit Child.
To get started, use Bulk Import to upload your enrolment data from a CSV file, or click Add Child to add children one at a time.