
Bulk Import Children
Click to view full screen…
Bulk import is the most efficient method for adding or updating children. The system matches records by Child ID, so re-importing a file will update existing children's details rather than creating duplicates. The system guides you through a four-step process with built-in validation to help catch errors before they're imported.
Before you begin, make sure your CSV file is ready. See Prepare Your CSV File.
Upload CSV (Step 1 of 4)
Click Bulk Import to open the import wizard.
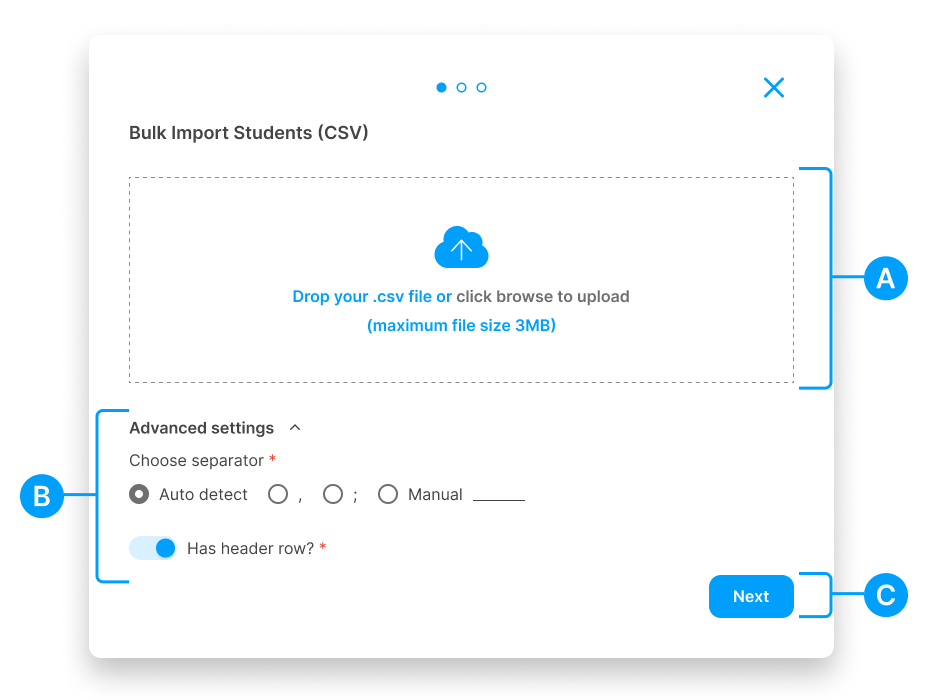
(A) Upload area - Drag and drop your CSV file, or click to browse (max 3MB)
(B) Advanced settings - Choose your separator and confirm your file has a header row. These values typically don't need to be changed.
(C) Next - Click to proceed to field mapping
Once you click Next, you'll move to field mapping.
Map Fields (Step 2 of 4)
Match the columns in your CSV file to the fields required by the system.

(A) Auto Match Fields - Click to let the system automatically match your CSV columns to the required fields. The provided CSV templates are set up to work with this feature. If you're using your own file, this works best when your column headers match the expected field names.
(B) Field mapping - Use the dropdowns to manually select which CSV column maps to each field:
First Name
Last Name
Child ID
Date of Birth
Gender (Male, Female, Non-binary)
First Nations Status (Yes, No, Unspecified)
Grade
Class/Group (optional)
(C) Next - Click to proceed to data validation
Once all fields are mapped, click Next to validate your data.
Data Validation (Step 3 of 4)
The system checks your data before importing. Take time to review this step carefully.
If Errors Are Found
The system displays a summary of issues and highlights problem areas in your data.
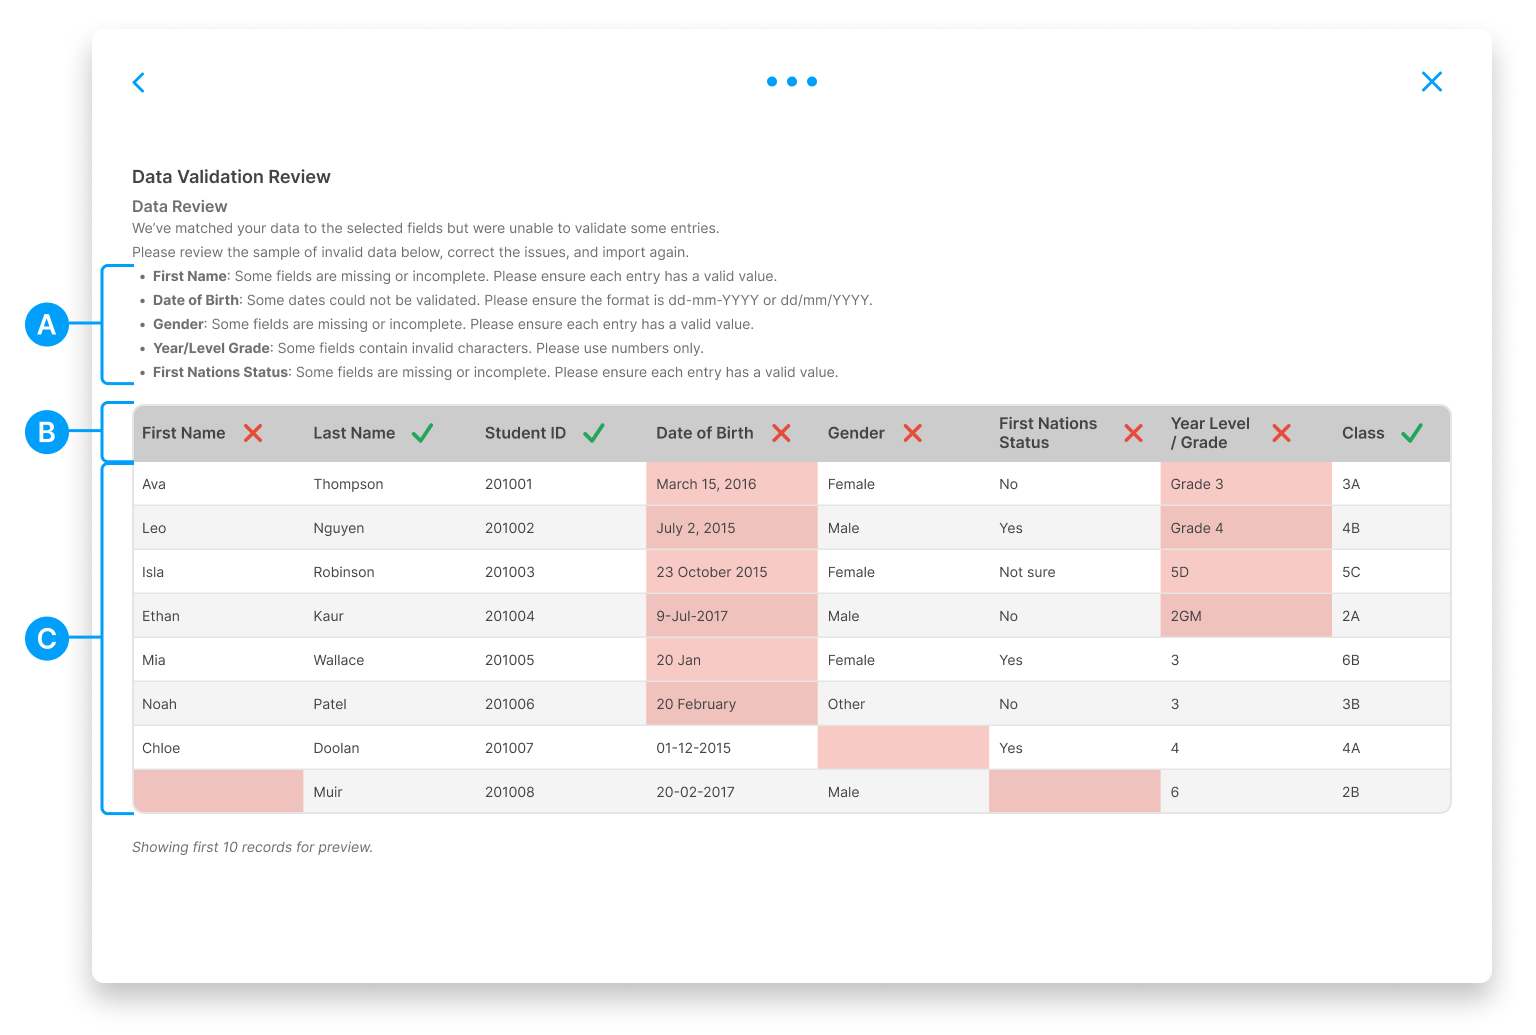
(A) Error summary - A list at the top explains what needs fixing:
Missing or incomplete fields
Invalid date formats (expects dd-mm-YYYY or dd/mm/YYYY)
Invalid characters (e.g., letters in the Grade field)
(B) Column headers - Show a ✓ tick (valid) or ✗ cross (errors found) for each field
(C) Data preview - Shows the first 10 records. Cells with errors are highlighted in pink.
To fix errors, go back to your CSV file, correct the issues, and re-upload.
When All Data Is Valid
When all fields pass validation, every column header shows a green ✓ tick. Review the sample data to confirm it looks correct, then click Complete to finish the import.
Review Flagged Records (Step 4 of 4)
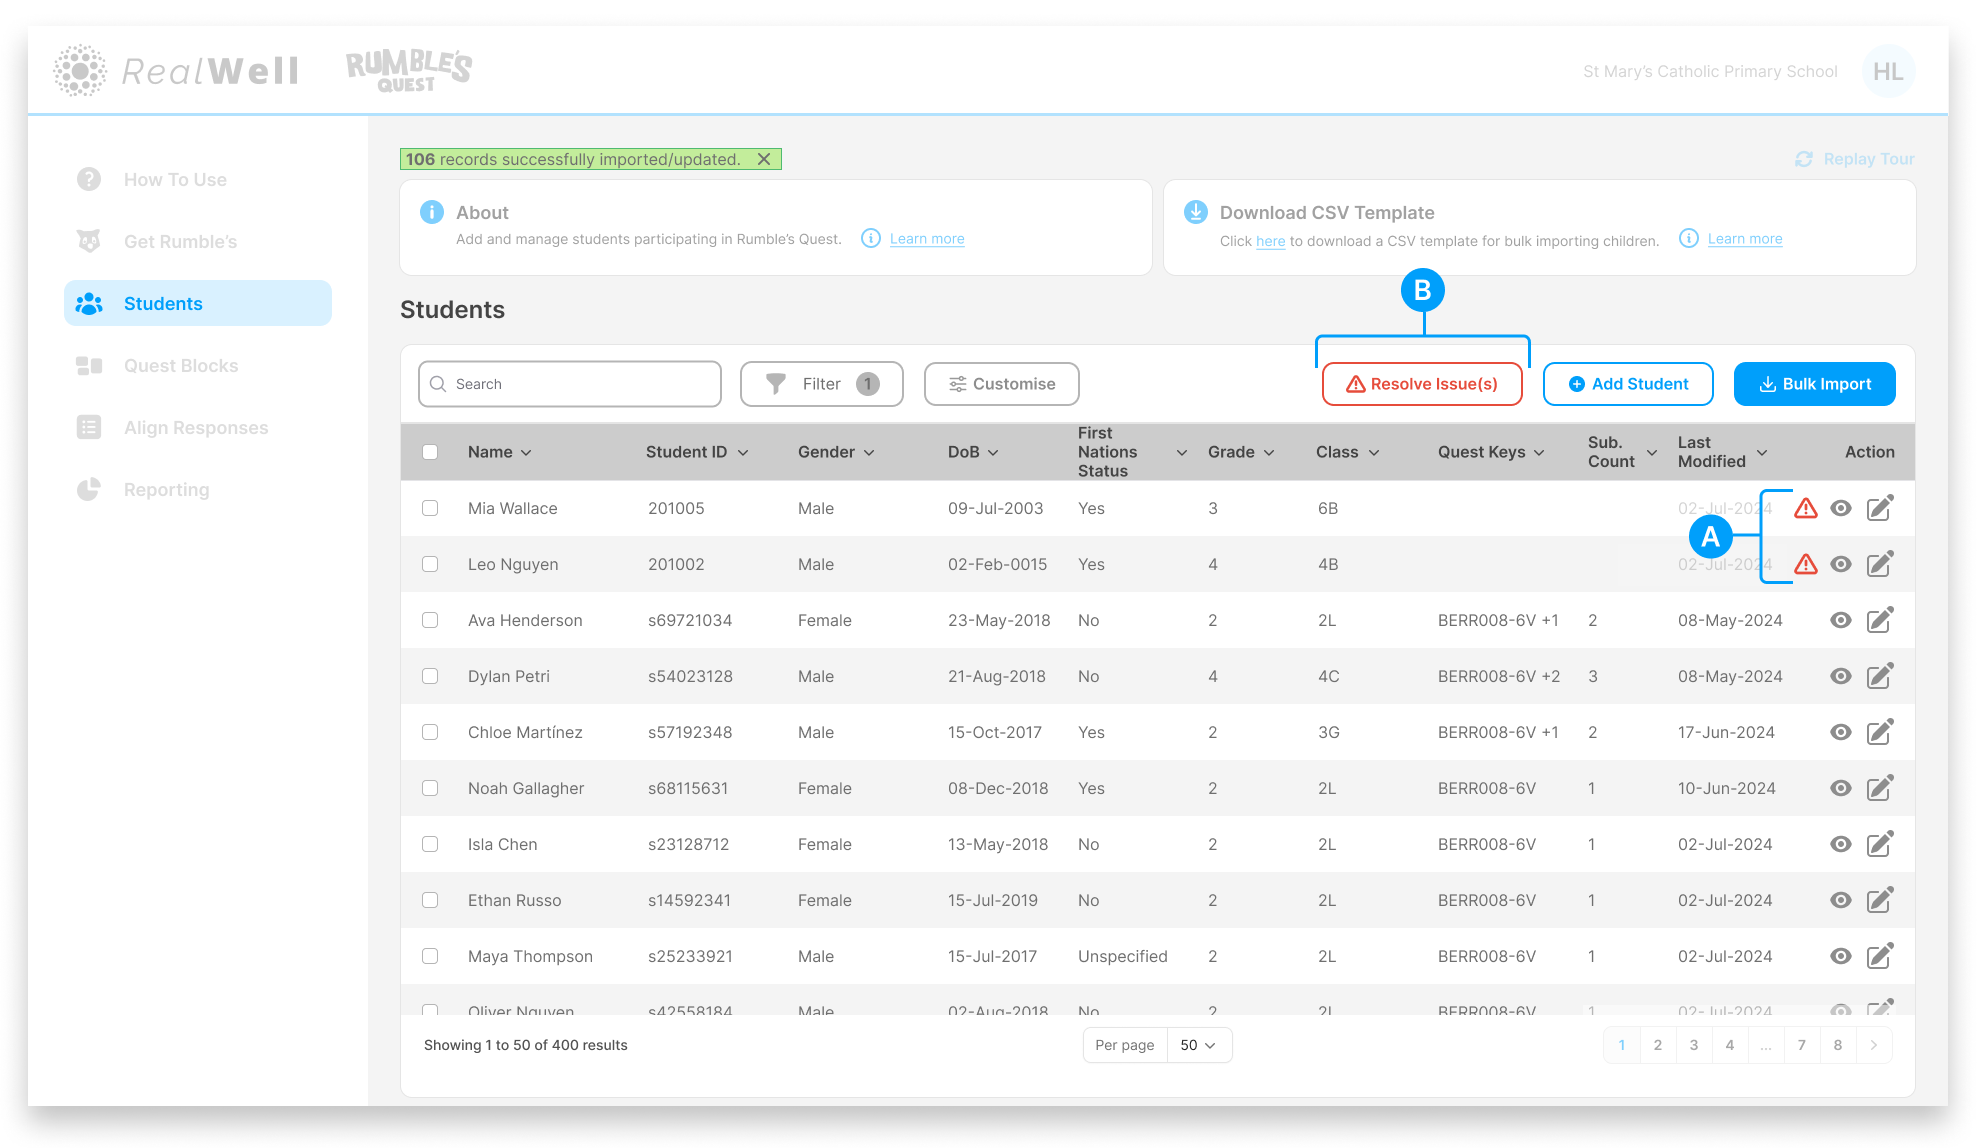
After the import completes, the system checks whether each child's date of birth falls within the expected age range for Rumble's Quest (typically 6–12 years old at import). If all dates fall within this range, you're done. If any records fall outside this range, you'll see:
(A) Warning icons – Show which records have been flagged
(B) Resolve Issue(s) – Click to open the Validation Review modal
Click Resolve Issue(s) to open the Validation Review modal, where you can review and resolve each flagged record.
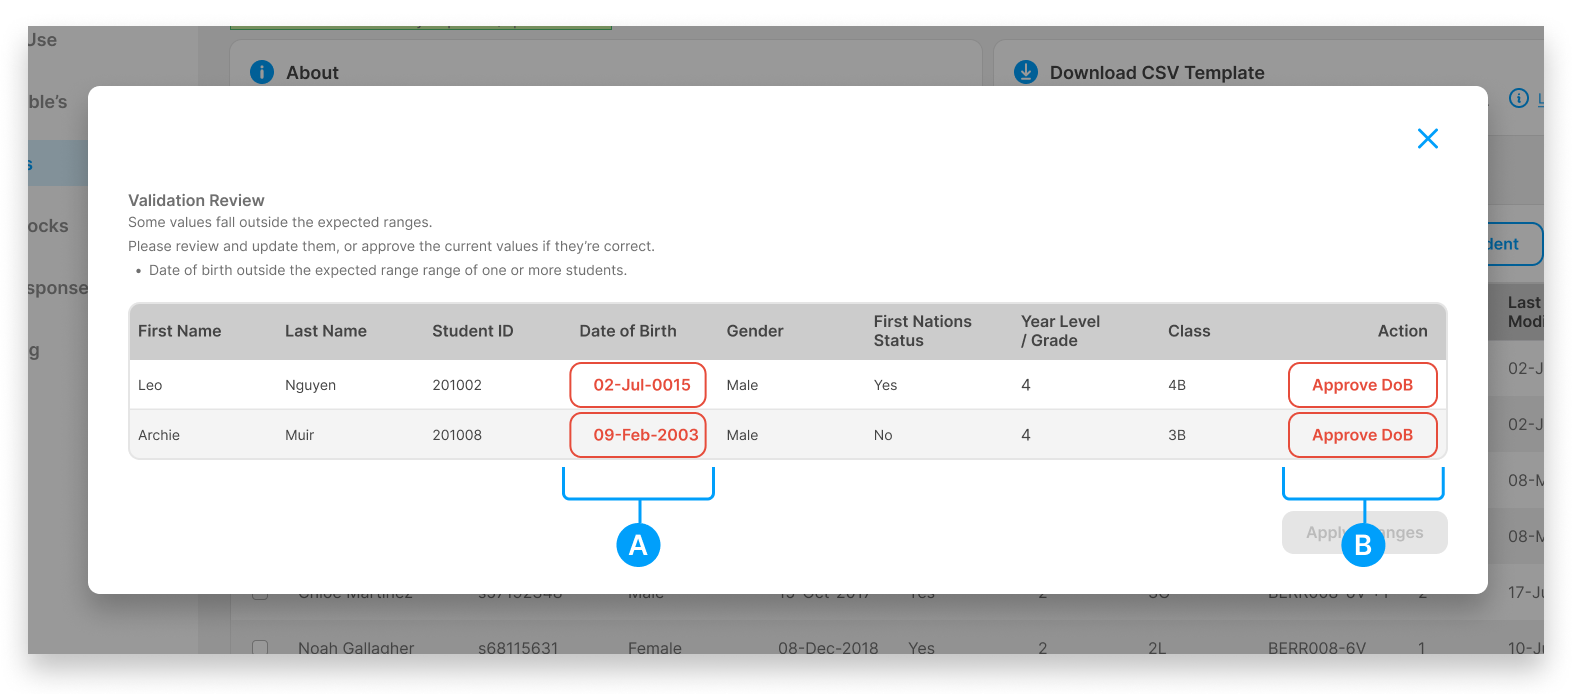
(A) Flagged dates – Dates outside the expected range are highlighted. Click on a date to correct it using the date picker.
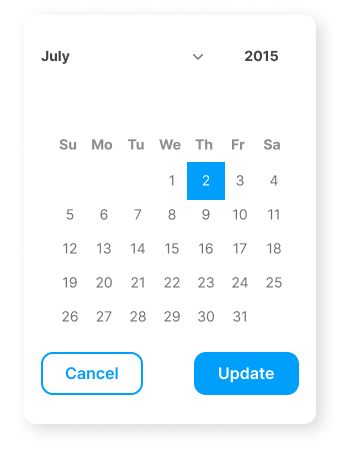
(B) Approve DoB – Click to accept the date as correct, or click the date itself to edit it
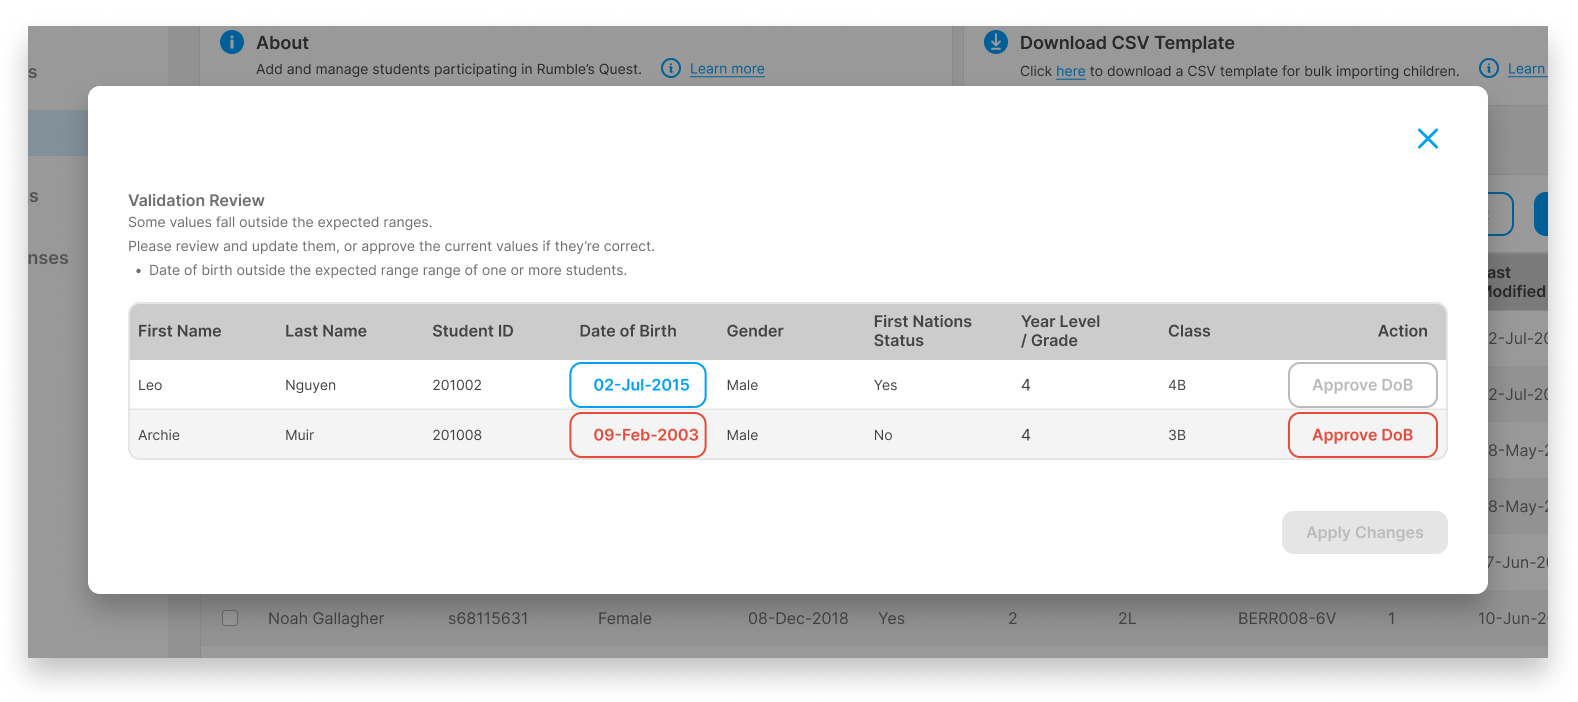
Once all flagged records have been reviewed, click Apply Changes to save.