
Apps - Activate Licence Plan
Click to view full screen
The Apps & Billing page allows you to view available apps, activate new plans, and manage existing plans for your organisation.
Invoicing and Payment Options
RealWell offers flexible ways to pay for your app plans.
Invoicing
By default, invoices are made out to your RealWell account organisation and addressed to the person who activates the plan.
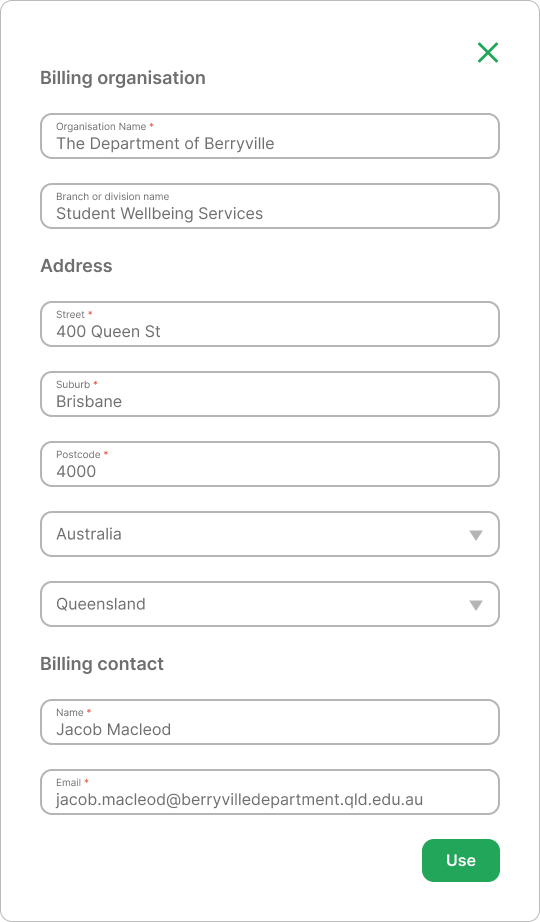
You can update the billing organisation and contact details if another organisation or contact needs to be invoiced.
Immediate Credit Card Payment
You can pay by credit card immediately during the app licensing process.
Request an Invoice
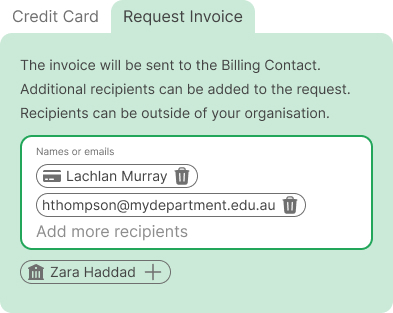
As an alternative to immediate payment, you can request an invoice.
Invoices are sent to the billing contact and any additional contacts you’ve set (internal or external). The invoice includes a secure credit card payment link. You can also pay by direct deposit if preferred.
A temporary 30-day licence is provided so you can access the app while payment is being processed.
This guide explains how to activate an app plan (example: Rumble’s Quest).
Apps View
Apps & Billing > Apps
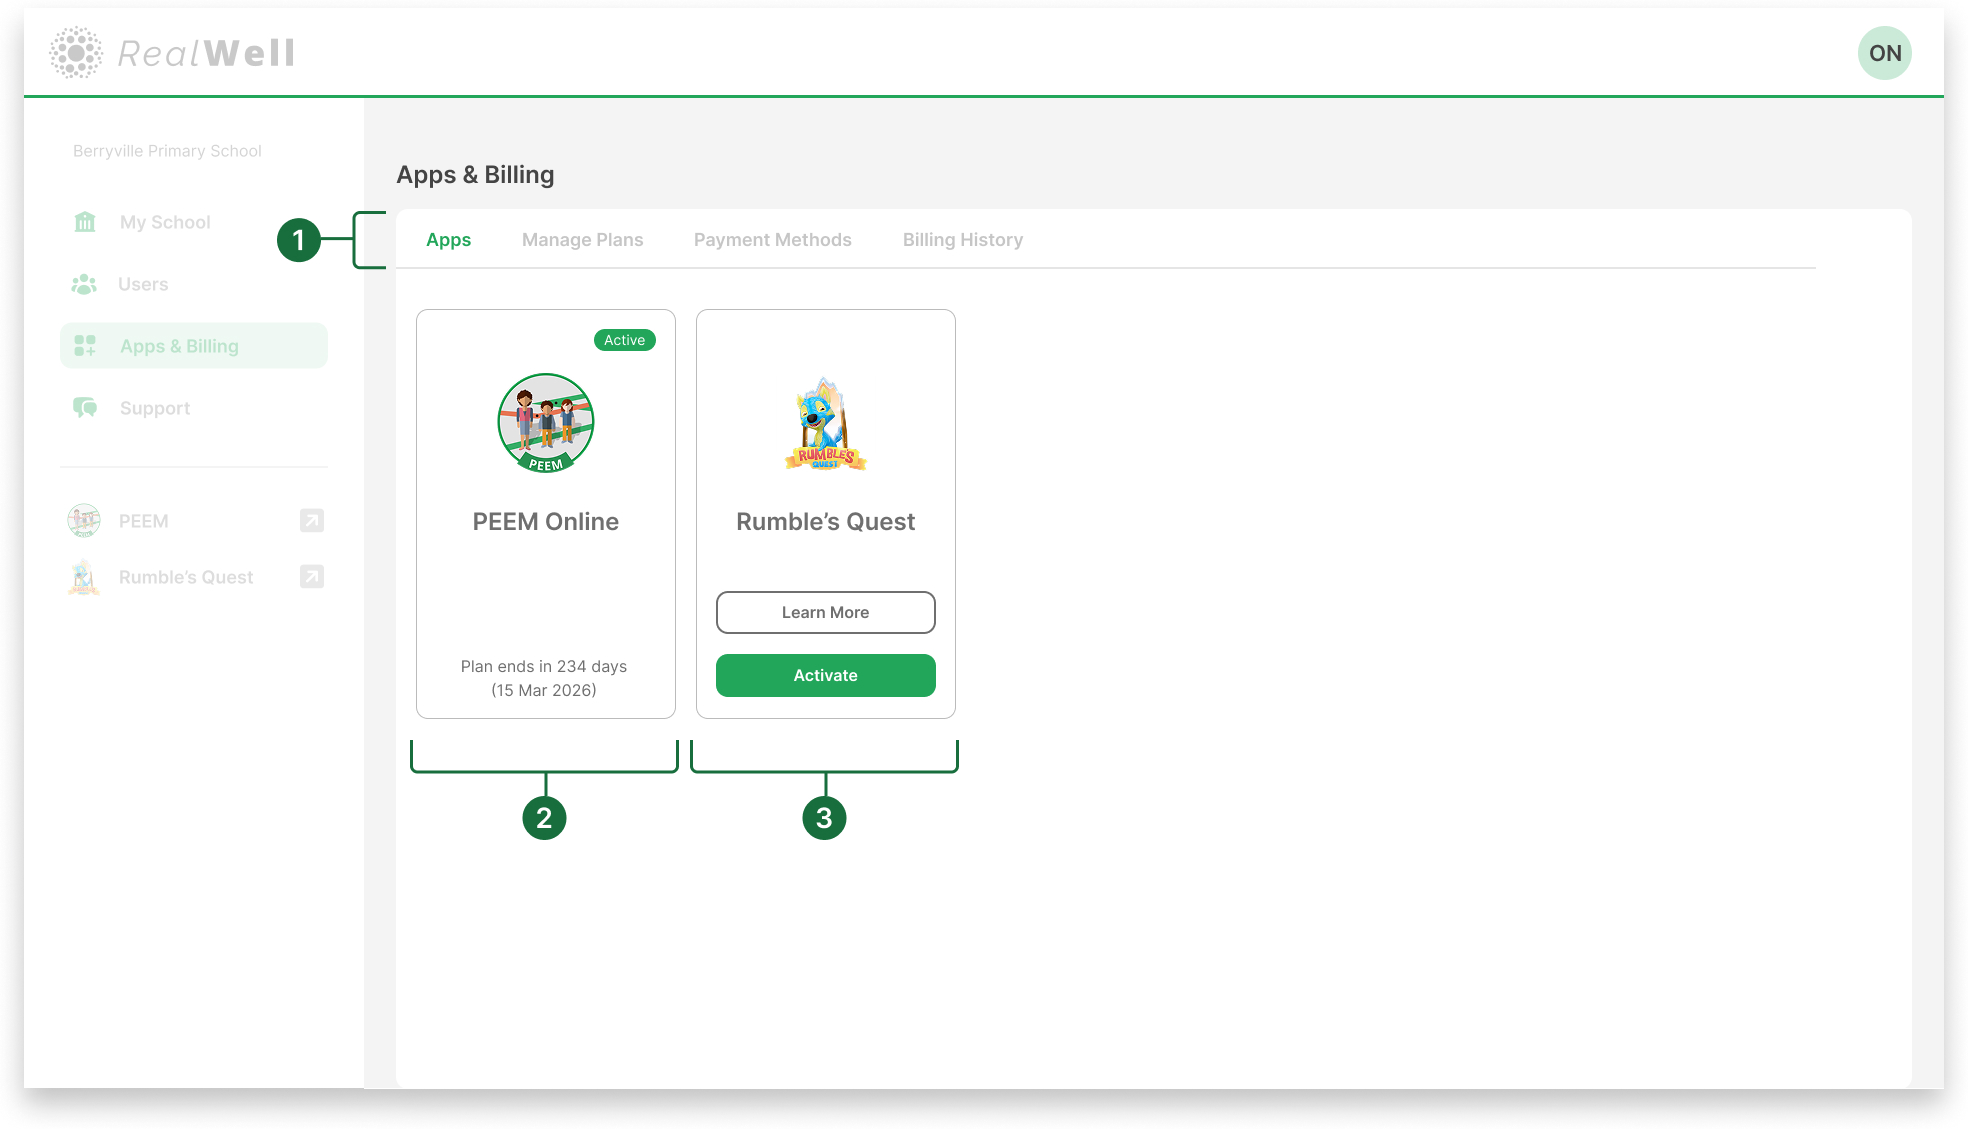
Sub-navigation bar: Located at the top of the Apps & Billing page, this bar provides access to different functions for managing your organisation’s apps and billing. The Apps tab is selected, showing available applications which can be activated.
Licensed product: Shows an app with an active licence. The card displays the plan status and expiry date.
Unlicensed product: Shows an app without an active licence, with options to Learn More or Activate.
Activate an App
Select Activate on the desired app to begin the plan activation process.
Configure Your Licence (page 1 of 3)

Quota field: Enter the total number of participants for the licence.
In this example, the quota is the number of students participating in Rumble’s Quest for the 12-month plan.Summary panel: Review licence details, including start date, expiry date, cost, and tax.
Continue: Proceed once you’ve entered the quota and reviewed the summary.
Billing and Payment (page 2 of 3)
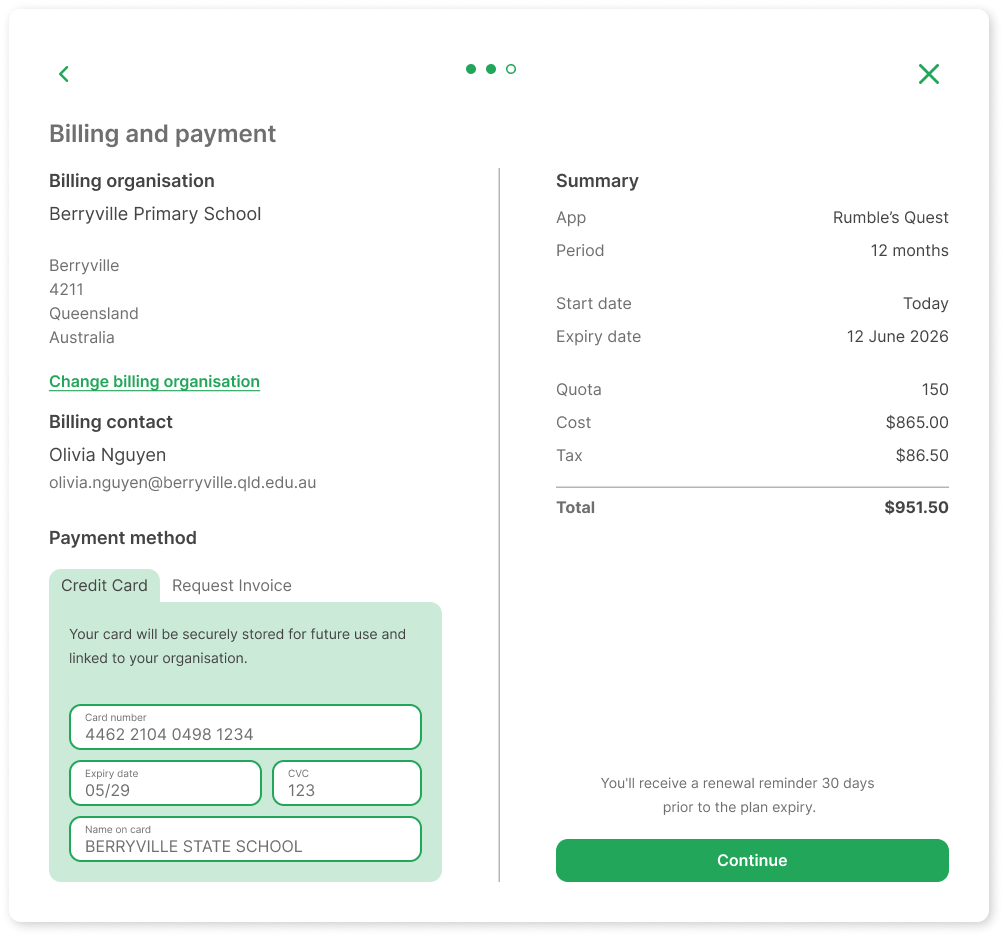
Billing organisation: Shows your organisation’s billing details.
Billing contact: Displays the contact person and email linked to billing. By default, this is the user activating the licence.
Change billing organisation: Update the billing organisation and contact by selecting Change billing organisation and editing the details in the window. The invoice and receipt will be addressed to the billing organisation and sent to the billing contact.
Payment method: Choose between Credit Card or Request Invoice.
Credit Card: Enter card details to pay securely by card
Request Invoice: Add RealWell or external contacts to receive the invoice and payment instructions.
Continue: Move on to the final review.
Ensure your billing contact and payment details are correct before continuing.
Review & Payment (page 3 of 3)
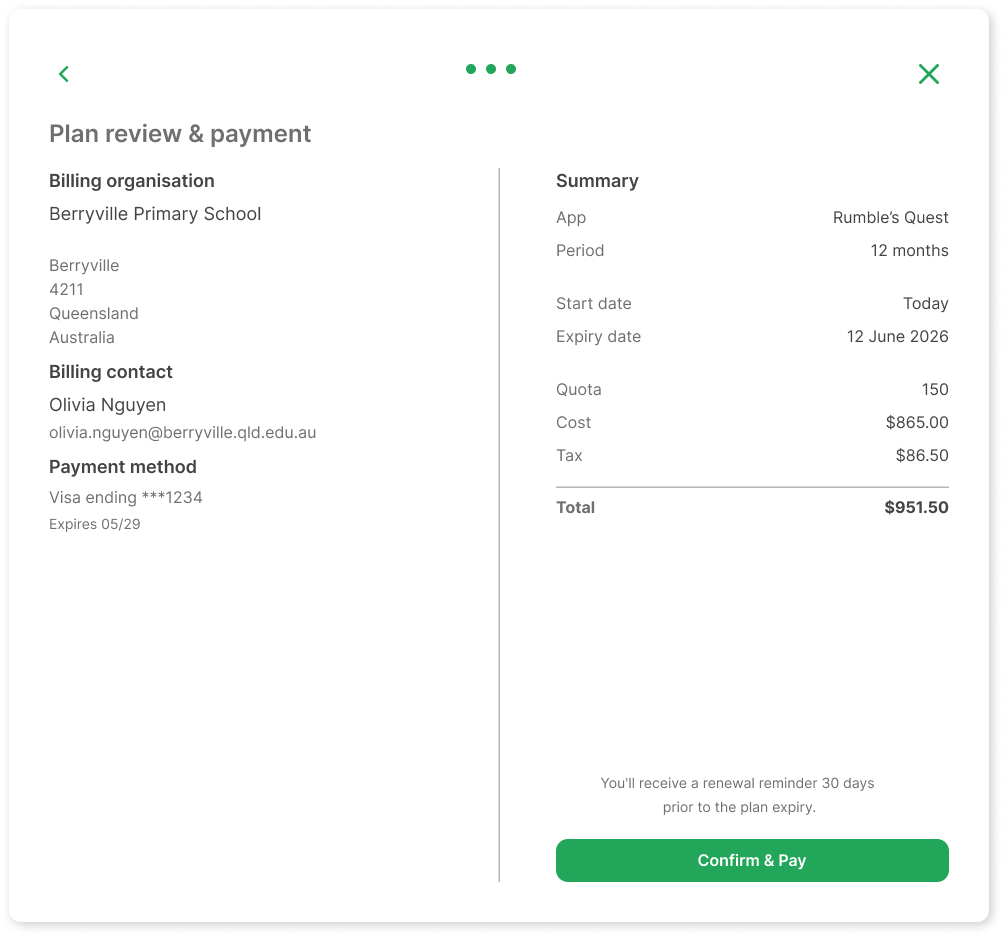
Review details: The Review & Payment window displays all licence information, including organisation, billing contact, payment method, and summary.
Confirm & Pay: Select when you’re happy to proceed.
Credit card payment: The licence is applied to your account immediately.
Invoice request: A 30-day temporary licence is applied, giving you immediate access to the app. To keep your licence active, payment must be arranged within 30 days.